How to Use a Rowing Machine 2026: Proper Stroke Form, Damper Settings & Common Mistakes Fixed
Walk into almost any commercial gym and watch someone hop onto an indoor rower for five minutes. Nine times out of ten, you’ll see the exact same routine: they slide the flywheel damper lever straight to 10, hunch their shoulders toward their ears, yank the handle to their chin before their legs even move, and loop the chain up and over their bent knees on the way back. Ten minutes later, their lower back is barking, their forearms are fried, and their heart rate barely budged.
Rowing looks like an upper-body pulling exercise, but biomechanically it’s a horizontal deadlift-and-leg-press sequence. When you dial in clean ergometer mechanics, your legs generate 60% of the power, your core hip-hinge contributes 20%, and your arms finish the final 20%. Whether you just unboxed one of our top-ranked best rowing machines for your garage or want to shave ten seconds off your 2,000-meter benchmark split, this step-by-step coaching guide breaks down the exact stroke sequence, damper calibration, and form fixes you need.
1. The 4 Phases of the Rowing Stroke (The 60-20-20 Rule)
Every fluid stroke on an indoor rower flows through four continuous landmarks: The Catch, The Drive, The Finish, and The Recovery. Repeat this three-word mantra in your head until it becomes muscle memory: “Legs, Body, Arms—Arms, Body, Legs.”
Phase 1: The Catch (Coiled Spring Position)
Sit tall on the front edge of your sitting bones rather than slumping onto your tailbone. Slide forward on the monorail until your shins are completely vertical (perpendicular to the floor)—don’t let your knees push past your ankles, which puts shearing stress on your patellar tendons. Hinge slightly forward from your hips so your shoulders sit just in front of your pelvis (roughly an 11 o’clock torso angle), keep your arms straight and relaxed like steel cables, and let your heels lift naturally by an inch if your ankle mobility requires it.
Phase 2: The Drive (Legs First, Then Hip Swing, Then Arm Pull)
The Drive is where all work happens, and it must unfold in three distinct gears:
- 60% Leg Press: Drive your heels flat into the footboards while keeping your arms completely straight and your core braced. Your shoulders and hips must travel backward at the exact same speed. If your hips shoot backward while your handle stays stuck near the flywheel cage, you’re leaking power into your lumbar spine.
- 20% Hip Hinge (Body Swing): Once your knees are nearly flat, swing your torso open from the hips—moving from an 11 o’clock forward lean to a firm 1 o’clock layback. Engage your glutes and hamstrings to transfer momentum from the footboards into the handle.
- 20% Arm Finish: Only after your legs are down and your torso has swung open do you bend your elbows, drawing the handle cleanly into your lower ribs (right below your sternum).
Phase 3: The Finish (Clean Extraction)
At the Finish, your legs are pressed flat against the monorail, your abs are braced at a slight 1 o’clock layback, your shoulders are relaxed down away from your ears, and your wrists are flat. Don’t curl your wrists upward like a motorcycle throttle, and never yank the handle up to your collarbone or chin—that recruits your upper traps instead of your broad latissimus dorsi muscles.
Phase 4: The Recovery (The 2:1 Ratio Glide)
Most beginners rush right back up the slide, turning rowing into a frantic treadmill sprint. Instead, the Recovery should take twice as long as the Drive (a 1-second explosive drive followed by a calm 2-second recovery glide). Reverse the drive sequence in exact mirror order: first, push your hands straight away from your ribs until the handle clears your kneecaps; second, hinge your torso forward from the hips back to 11 o’clock; third, allow your knees to bend and float up the monorail to the next Catch.
🏋️ Marcus’s Training Log: The 2-Minute ‘Pick Drill’ That Eliminates Early Arm Pulling Forever
Whenever I’m coaching a lifter or runner who can’t stop bending their elbows at the start of the stroke, I put them through the classic boathouse Pick Drill during their warmup. Strap your feet in and row 10 strokes using arms only (legs flat, torso leaning slightly back at 1 o’clock). Then row 10 strokes with arms and body swing only (hinging from 1 o’clock to 11 o’clock while keeping your legs straight). Next, row 10 strokes at half-slide, and finally transition to full-slide strokes. Breaking the stroke down in reverse teaches your nervous system to let your hands clear your knees before your seat ever rolls forward.
2. Damper Settings (1–10) vs. Drag Factor Explained
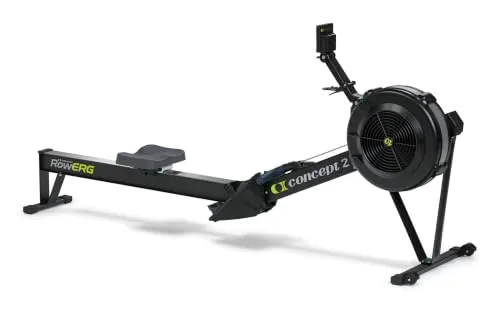
On an air-flywheel ergometer like the Concept2 RowErg—our #1 overall pick in our best rowing machines guide—the lever on the side of the fan cage numbered 1 through 10 is a ventilation damper, not a weight stack selector. Opening the damper to 10 floods the cage with heavy air, making the flywheel decelerate rapidly between strokes; closing it to 1 lets only a sliver of air inside so the wheel stays spinning fast.
Because dusty gym vents, altitude, and room temperature change how much air enters the cage, competitive coaches use the monitor’s internal Drag Factor reading (`More Options > Display Drag Factor` on a PM5 screen) or calibrate magnetic/water tension to match their training goal:
| Athlete Profile / Goal | Air Damper Setting | Target Drag Factor | 16-Level Magnetic Equivalent |
|---|---|---|---|
| Beginners, Rehab & Joint Mobility | Damper 2 – 3 | 95 – 110 | Levels 4 – 7 |
| Aerobic Endurance & Lightweight Rowers | Damper 3 – 4 | 110 – 120 | Levels 8 – 11 |
| Heavyweight Rowers & 2,000m Tests | Damper 4 – 5.5 | 120 – 135 | Levels 12 – 14 |
| Short 10-Stroke Peak Wattage Sprints | Damper 6 – 8 | 140 – 160 | Levels 15 – 16 |
3. Five Common Rowing Form Mistakes (And How to Fix Them)
Even small timing errors compound over a 30-minute session—turning a low-impact workout into lower-back tightness. Watch out for these five classic faults:
- “Shooting the Slide” (Bumper Butt): Your hips shoot backward toward the rear of the monorail while your shoulders stay pitched forward and the handle barely moves. The Fix: Brace your lats as if doing a straight-arm lat pulldown before you push with your legs, locking your torso angle until your knees pass halfway down.
- Looping Over the Knees (The Rainbow Recovery): Bending your knees too early on the recovery forces you to lift the handle up and over your kneecaps in a rainbow arc. The Fix: Wait until your hands visibly pass your patellas before allowing your knees to unlock.
- Over-Compressing at the Catch: Sliding so far forward that your heels pop three inches off the pedals and your shins angle past 90 degrees. The Fix: Stop your forward slide the instant your shins hit vertical. If your rower’s rail feels cramped at full extension, check the monorail inseam specs in our best rowing machines comparison table.
- Death-Gripping the Handle: Wrapping your thumbs tightly underneath the grip creates forearm pump and elbow tendonitis. The Fix: Hook your four fingers loosely over the top of the handle with your thumbs resting lightly alongside—treat your hands like relaxed meat hooks.
- The Extreme Layback at the Finish: Leaning back 45 degrees like you’re doing a decline sit-up wastes energy and strains your hip flexors. The Fix: Stop your torso swing at a crisp 1 o’clock angle (roughly 15 to 20 degrees past vertical).
🏋️ Marcus’s Training Log: Why Foot Strap Height Dictates Your Catch Angle (And Lower-Back Comfort)
Before I let an athlete pull a single stroke, I have them look down at the adjustable plastic heel cups on their footboards. Most people leave the footplates wherever the previous user set them, which usually parks the nylon Velcro strap way too high near the ankle crease. When the strap sits across your upper instep, it pins your shin backward and blocks natural ankle dorsiflexion—so you’re forced to round your lower spine just to reach the catch. I always adjust the heel cup holes up or down until the nylon strap crosses directly over the ball of your foot (the base of your big toe joint). That single thirty-second tweak ensures your heels aren’t trapped and keeps your lumbar spine neutral.
4. Three Beginner-to-Advanced Rowing Workouts (Splits & SPM)
Once your stroke sequence feels automatic, don’t just row aimlessly—structure your sessions around two metrics: Stroke Rate (SPM / s/m)—how many times you slide up and down per minute—and 500-Meter Split Pace—how fast the boat moves based on how hard you press with your legs. You’ll get far better conditioning when you pair these sessions with a set of adjustable dumbbells or a home gym circuit for total-body strength:
- Workout 1: The Rhythm Pyramid (20 Minutes — Technique & Aerobic Base): Row 4 minutes at 18 SPM, 3 minutes at 20 SPM, 2 minutes at 22 SPM, 1 minute at 24 SPM, then climb back down (2 min @ 22, 3 min @ 20, 4 min @ 18). Try to hold the exact same 500m split pace even when the stroke rate drops to 18 SPM by pressing harder with your quads.
- Workout 2: The 500-Meter VO2 Max Intervals (4 to 6 Rounds): Row 500 meters at a hard, controlled sprint (26 to 30 SPM), followed by 90 seconds of super-light recovery paddling at 16 SPM. Aim to keep your fastest and slowest 500-meter intervals within two seconds of each other.
- Workout 3: The 30-Minute Rate-20 Power Endurance Builder: Set the monitor for 30 minutes and lock your cadence strictly at 20 strokes per minute. Low-rate rowing forces you to generate every watt through explosive leg drive while giving you two full seconds to breathe on every recovery slide.
5. Frequently Asked Questions About Rowing Technique
Why does my lower back ache after using a rowing machine?
Lower-back soreness almost always comes from three culprits: setting the damper too high (8 to 10), “shooting the slide” by straightening your legs before bracing your core and lats, or rounding your lumbar spine at the catch because your hamstrings are tight. If your back feels tight, don’t push through pain—drop your damper down to 3 or 4, lower your footplates by one notch, and keep your chest tall at the catch.
Should my heels stay flat or lift up at the catch?
It’s completely normal for your heels to lift slightly (about half an inch to an inch) at the very front of the catch as your shins reach a 90-degree vertical angle, unless you have exceptional Olympic-weightlifter ankle mobility. However, the instant you initiate the drive, your first priority is pressing your heels flat into the footboards so your glutes and quads take the load.
What is the difference between Stroke Rate (SPM) and Split Time (/500m)?
Stroke Rate (SPM) measures tempo—how many strokes you take per minute (typically 18 to 30 SPM). Split Time (/500m) measures output—how long it’d take you to cover 500 meters at your current leg-drive force. A skilled rower can hold a fast 1:55/500m split at a calm 20 SPM by exploding off the footboards and gliding slowly on the recovery.
What shoes should I wear on an indoor rowing machine?
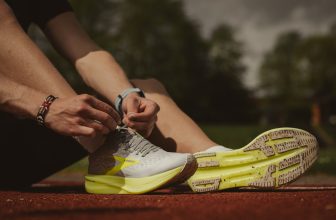
Skip thick, squishy max-cushion running shoes, which absorb leg-drive force like marshmallows and won’t keep your heels stable at the catch. Instead, wear flat, firm-heeled trainers like our top-ranked CrossFit shoes or men’s and women’s workout shoes so every watt transfers straight into the footboards.